Creating a Product
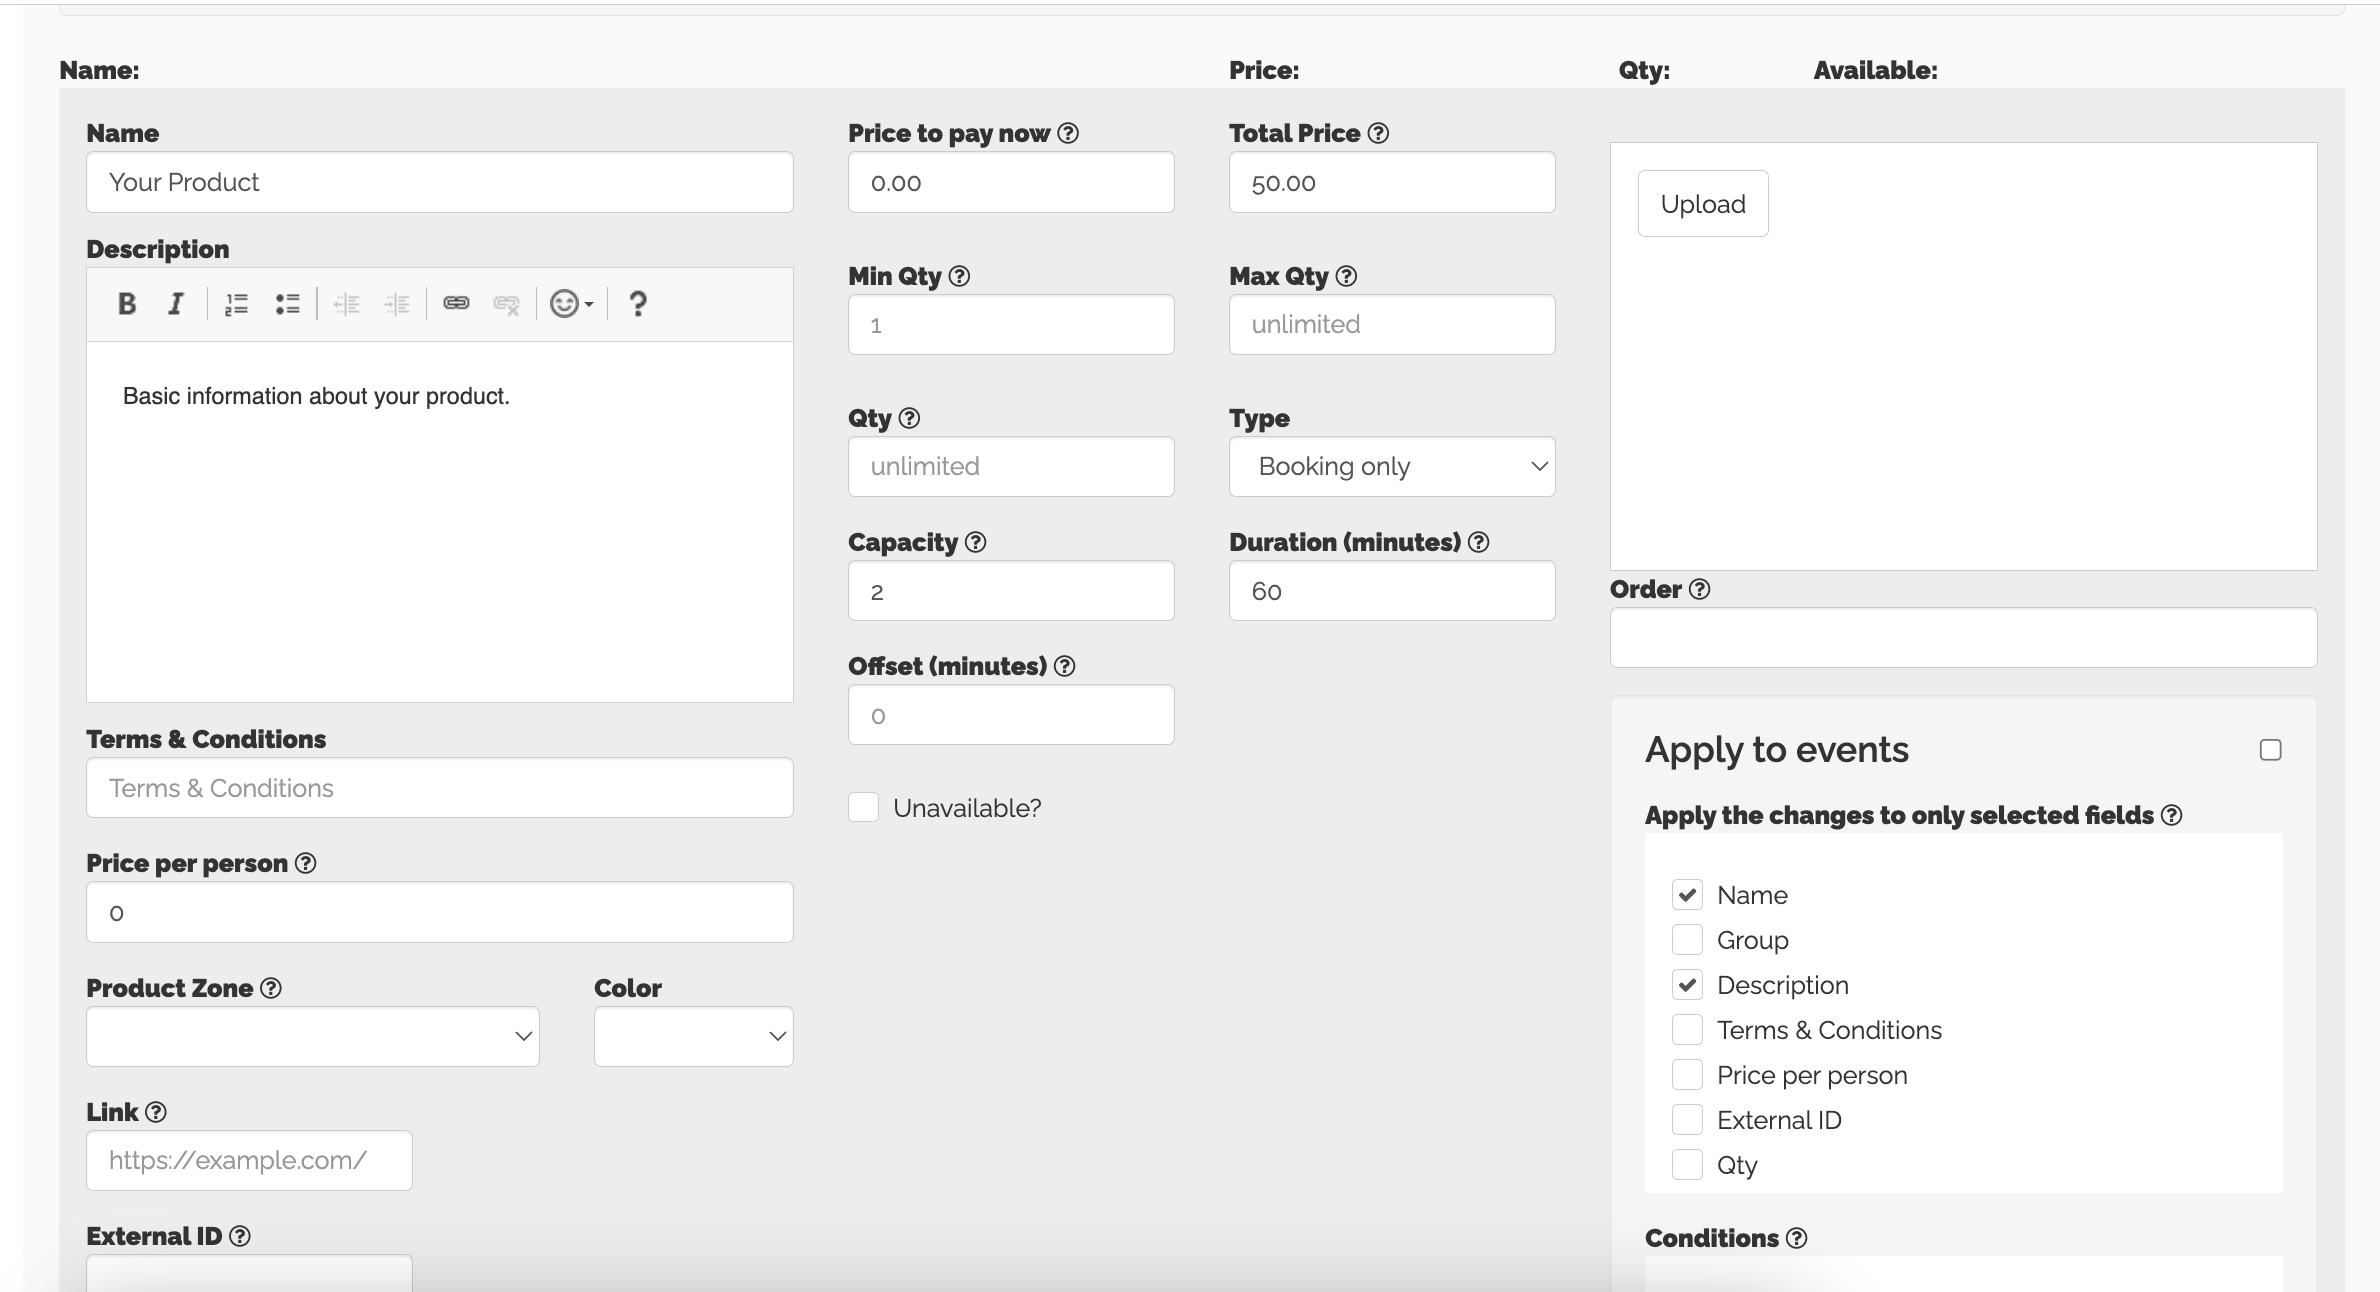
Once you have all of your Booking Categories set up you're ready to start creating products, this guide will give you an overview of the different variables you can control.

Name - The name of your product.
Description - A brief description that will display under your product.
Terms & Conditions - Add restrictions your customer needs to know about for this specific product.
Price Per Person - Adding something to this box will replace the price displayed to the customer with what you enter here. (Not Required)
Product Zone - If using Bookings Management, this controls which area the product will display.
Colour - If using Bookings Management, this will control the colour the product reserves on the calendar.
Link - If clicking on the product needs to to take the customer to a different web page, add the link for that page here.
Price To Pay Now - A deposit price for your product.
Total Price - The total price of your product, this includes the deposit if being used.
Min Qty - The minimum number of products that would be added to a customers basket.
Max Qty - The maximum number of products that would be added to a customers basket.
Qty - The total number of products available.
Type - Different categories for a product/booking, enquiry, booking and enquiry (gives the customer the choice) and Member only product.
Capacity - If using Bookings Management, the number of spaces that would be reserved.
Duration - If using Bookings Management, the time the booking would be reserved for.
Offset - If using Bookings Management, this will offset the start time of this product from the booking time in minutes.
Offset - If using Bookings Management, this will offset the start time of this product from the booking time in minutes.
Unavailable - Tick this to make the product unavailable online.
Upload - Add an image of your product.
Order - This controls the order in which the products will be displayed on the dashboard and during checkout, simply add the number yourself.
Apply to Events - When making changes to products, ticking the corresponding tick box here will make the changes across live events.
Sub-Options (Not Shown in Image) - Use sub-options to add variances to a single product.
Once you have completed the required details for your product you can Save the product at the bottom of the page.

If you already have events setup, creating a new product will add the product to all existing events.
Related Articles
How To Create A Product Set
On Booked It, you can create a Product Set for all the different services you are looking to sell on the platform. Here’s a little walkthrough on how you can create a product set: Creating Product Sets To begin, sign in to your account and select the ...How To Create An Event
Using Booked It, you can create events for your venue for any day of the week. Here’s a little walkthrough so you can start creating your events: Creating Events To start, log into your dashboard and click on Events. In the Events tab, select the Add ...Creating an Event
To start, click Add New in the top right corner of the Dates and Special Events Page. Complete the details of the event, you can find an explanation of all sections in the Overview Article. The key event details are Name, Date, Start Time and End ...Editing Product in Bulk
It's possible to add and edit products in bulk using our Import and Export features. Whilst this is a quick way of editing in bulk, any errors can be very hard to correct, we do not recommend this if your products are already in use. By exporting ...How to use Minimum Spend
When creating a product set you have the option to include a minimum spend on a product. Using the example of a VIP table in a club, you may be able to select the booth for free but by adding £100 minimum spend you have to add £100 worth of drinks or ...